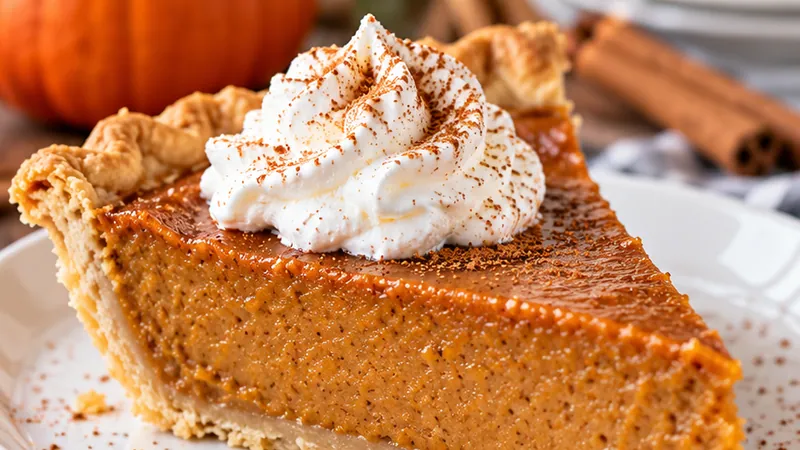
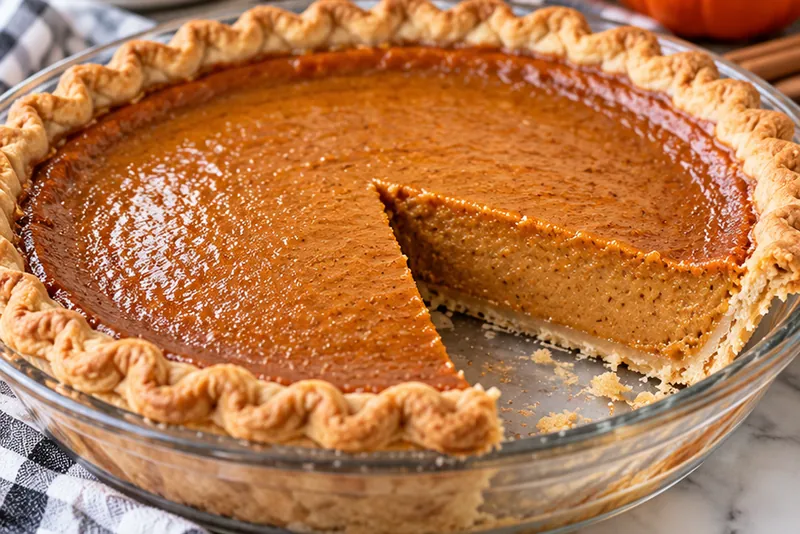
There is something about the smell of a pumpkin pie baking that makes a whole house feel like the holidays. Cinnamon, ginger, nutmeg, and a little clove drift out of the oven while the filling sets into a creamy, velvety custard. Each slice holds its shape, the crust shatters into buttery flakes, and the filling has that deep, caramel-kissed pumpkin flavor that tastes like fall.
This is the pie to make for Thanksgiving, Friendsgiving, or any cozy weekend from October through New Year's. Evaporated milk is the secret old-fashioned bakers swear by. It is richer than regular milk but lighter than heavy cream, so the filling turns out smooth and custardy without feeling heavy. Even better, you can bake it a day ahead, which frees up your oven on the big day.
 Save
I learned to make pumpkin pie standing next to my grandma, who kept a can of evaporated milk in the pantry all year just for this. She never measured the spices very carefully, but she always said a good pie needs patience while it cools. I have tested this version many times to get the spice balance and texture just right, and it tastes exactly like the slices I remember from her table.
Pumpkin Pie Recipe With Evaporated Milk (Easy)
Ingredients
Crust
Pumpkin Filling
Egg Wash
Instructions
- Make the crust dough
In a large bowl, whisk together the flour, salt, and sugar. Add the cold butter cubes and use a pastry cutter or your fingertips to work them in until the mixture looks like coarse crumbs with some pea-sized pieces of butter left. Sprinkle in 3 tablespoons of ice water and stir with a fork, adding more water 1 tablespoon at a time just until the dough holds together when you squeeze it.
- Chill the dough
Gather the dough into a ball, flatten it into a 1-inch-thick disk, and wrap it tightly in plastic wrap. Refrigerate for at least 1 hour, or up to 2 days. Chilling relaxes the gluten and firms up the butter, which gives you a flaky crust that does not shrink in the oven.
- Roll and shape the crust
On a lightly floured surface, roll the dough into a 12-inch circle about 1/8 inch thick, turning it a quarter turn every few rolls so it does not stick. Ease it into a 9-inch pie plate without stretching, trim the overhang to 1 inch, fold it under, and crimp the edges with your fingers or a fork. Freeze the shaped crust for 15 minutes while you heat the oven to 400°F.
- Blind bake the crust
Line the chilled crust with parchment paper and fill it to the top with pie weights or dried beans. Bake on the lower rack for 15 minutes, then carefully lift out the parchment and weights. Brush the bottom and sides with the egg wash and bake 4 to 5 minutes more, until the bottom looks dry and lightly golden. The egg wash seals the crust so the filling does not make it soggy.
- Lower the oven temperature
Set the baked crust on a rimmed baking sheet and reduce the oven temperature to 350°F. Baking the custard at a lower temperature is the key to a smooth, creamy filling without cracks or a rubbery texture.
- Mix the dry filling ingredients
In a large bowl, whisk together the brown sugar, granulated sugar, cinnamon, ginger, nutmeg, cloves, salt, and cornstarch until no lumps of brown sugar remain. Mixing the spices with the sugar first spreads them evenly so you do not get pockets of clove or nutmeg.
- Whisk in the pumpkin and eggs
Add the pumpkin puree to the sugar mixture and whisk until smooth. Add the eggs and the egg yolk and whisk gently until fully blended, but avoid whipping in lots of air, since bubbles can make the surface puff and crack.
- Add the evaporated milk
Slowly pour in the evaporated milk and vanilla while whisking, until the filling is completely smooth and pourable, about the thickness of a thin pancake batter. If you see any lumps, pour it through a fine mesh strainer for an extra silky texture.
- Fill and bake
Pour the filling into the warm crust, stopping about 1/4 inch from the top, and slide the baking sheet onto the middle rack. Bake for 45 to 55 minutes. If the crust edges brown too quickly, cover them with a pie shield or strips of foil after about 25 minutes.
- Check for doneness
The pie is ready when the edges are set and slightly puffed and the center 2 to 3 inches still jiggles gently, like gelatin, when you nudge the pan. An instant-read thermometer in the center should read 175°F. Do not wait for the middle to firm up completely, because it keeps setting as it cools and overbaking causes cracks.
- Cool completely
Transfer the pie to a wire rack and let it cool at room temperature for at least 2 hours. This slow cooling lets the custard finish setting so it slices cleanly. For the neatest slices, refrigerate it for another hour before cutting with a sharp knife wiped clean between cuts.
Substitutions and variations
- Swap the homemade crust for one 9-inch refrigerated pie crust if you are short on time; just fit it into the pan, crimp the edges, and blind bake as directed.
- Replace the individual spices with 2 1/2 teaspoons of pumpkin pie spice for a quicker shortcut with the same cozy flavor.
- Use fat-free evaporated milk for a lighter pie, though the filling will be slightly less rich and creamy.
- For a dairy-free version, use a vegan butter crust and swap the evaporated milk for one 13.5-ounce can of full-fat coconut milk.
- Use 1 3/4 cups of homemade roasted pumpkin or butternut squash puree in place of canned pumpkin, as long as it is blended smooth and well drained.
Chloe's tips
- Check the label to make sure you buy pure pumpkin puree, since pumpkin pie filling already has sugar and spices added and will throw off the recipe.
- Bring the eggs and evaporated milk to room temperature so the filling mixes smoothly and bakes evenly.
- Bake the pie on a rimmed baking sheet so it is easier to move in and out of the oven and any drips do not burn on the oven floor.
- Use fresh spices if you can; ground spices lose flavor after about a year, and a fresh jar of cinnamon makes a real difference.
- If a small crack does form, cover it with a swirl of whipped cream and no one will ever know.
How to store it
- Cover the cooled pie loosely with plastic wrap and refrigerate for up to 4 days, since custard pies should not sit at room temperature for more than 2 hours.
- Make the pie up to 2 days ahead; the flavor actually deepens overnight as the spices settle into the filling.
- To freeze, chill the pie completely, wrap it tightly in plastic wrap and foil, and freeze for up to 1 month, then thaw overnight in the refrigerator.
- Serve slices cold or at room temperature; if you like it slightly warm, heat a single slice in the microwave for 10 to 15 seconds.
Serving suggestions
This pumpkin pie is perfect on its own, but a few simple toppings make each slice feel extra special.
- A big dollop of homemade whipped cream with a pinch of cinnamon
- A scoop of vanilla bean or cinnamon ice cream
- A drizzle of salted caramel sauce and a few toasted pecans
- Maple whipped cream with a sprinkle of crushed gingersnaps
- A hot cup of coffee, chai latte, or apple cider on the side
Frequently asked questions
Why use evaporated milk in pumpkin pie?
Evaporated milk has about 60 percent of its water cooked off, so it adds richness and a slightly caramelized flavor without making the filling heavy. It also helps the custard set smoothly and is shelf-stable, which makes it easy to keep on hand for holiday baking.
Can I use sweetened condensed milk instead of evaporated milk?
You can, but they are not the same. Sweetened condensed milk is very sweet, so if you swap in one 14-ounce can, leave out both the brown sugar and the granulated sugar to keep the pie from becoming overly sweet.
Why did my pumpkin pie crack?
Cracks usually come from overbaking or from cooling too quickly. Take the pie out while the center still jiggles slightly, and let it cool slowly on a rack away from drafts. Whisking gently instead of beating air into the filling helps too.
Do I have to blind bake the crust?
It is not required, but it is highly recommended. Blind baking keeps the bottom crust crisp and flaky instead of soggy, since the wet custard filling takes a long time to set.
How do I know when pumpkin pie is done?
The edges should look set and slightly puffed while the center 2 to 3 inches still wobble gently when you shake the pan. If you have a thermometer, the center should register about 175°F.
Let's get cooking!
Once you make this easy pumpkin pie with evaporated milk, it might become the dessert everyone asks you to bring to the table each year. It is simple and comforting, and it tastes like the holidays in every creamy, spiced bite. So grab a can of pumpkin, put on your coziest apron, and enjoy the wonderful smell of pie filling your kitchen.