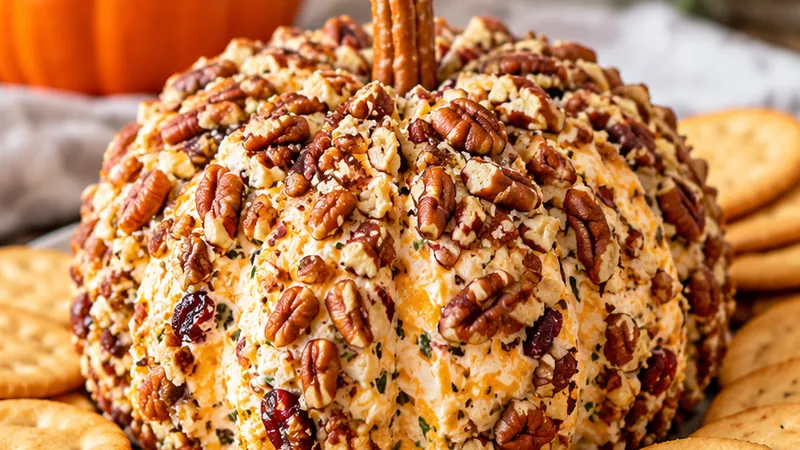
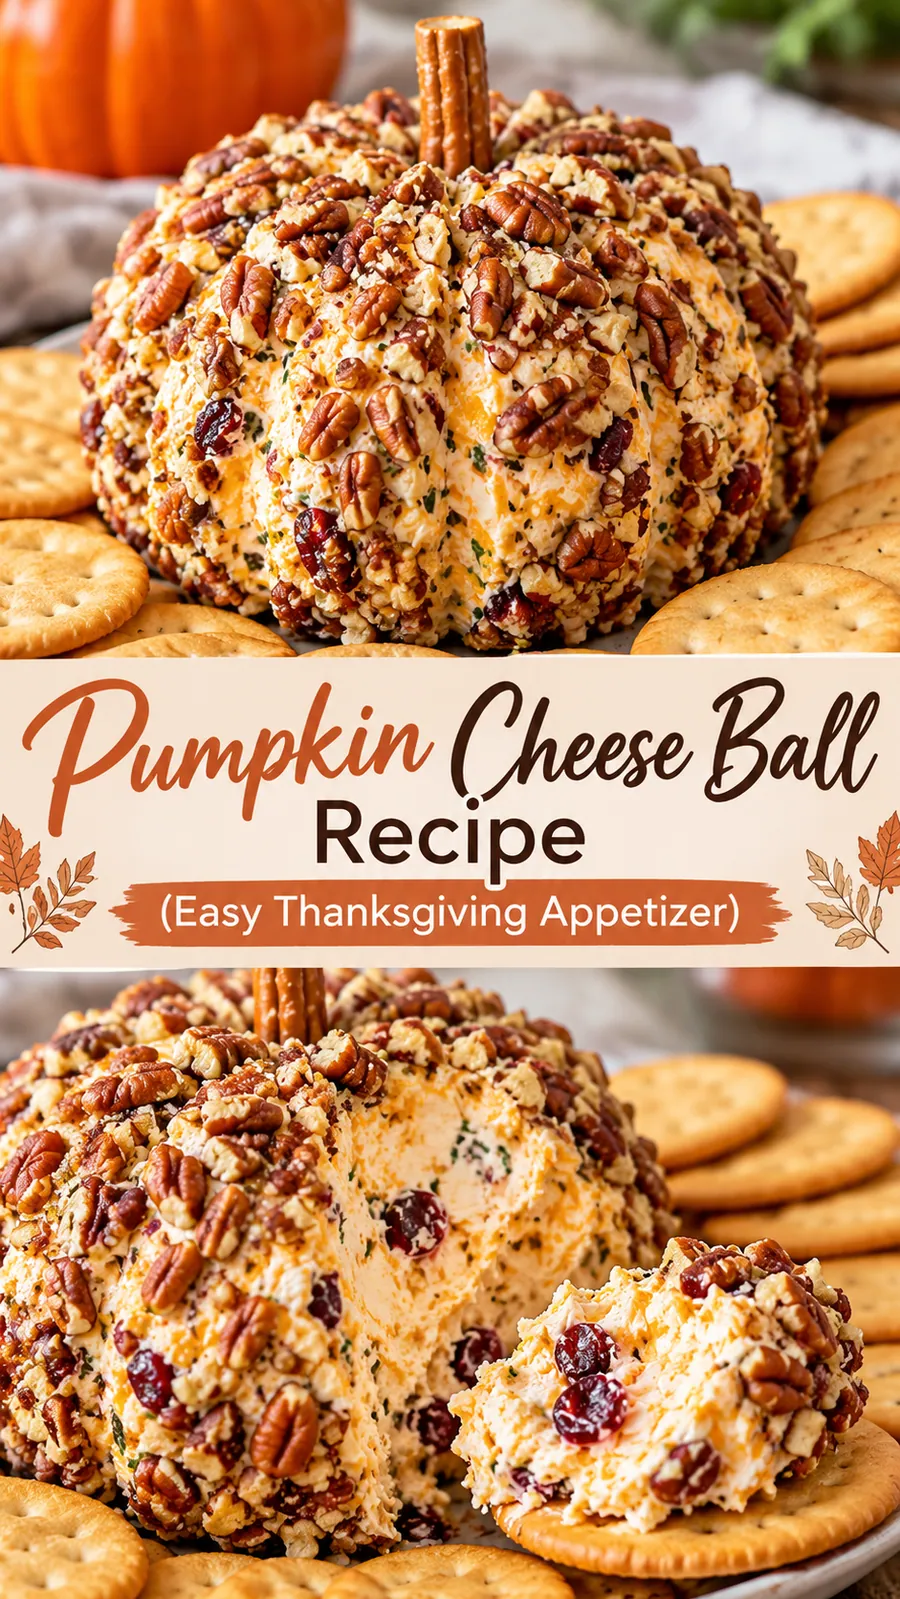
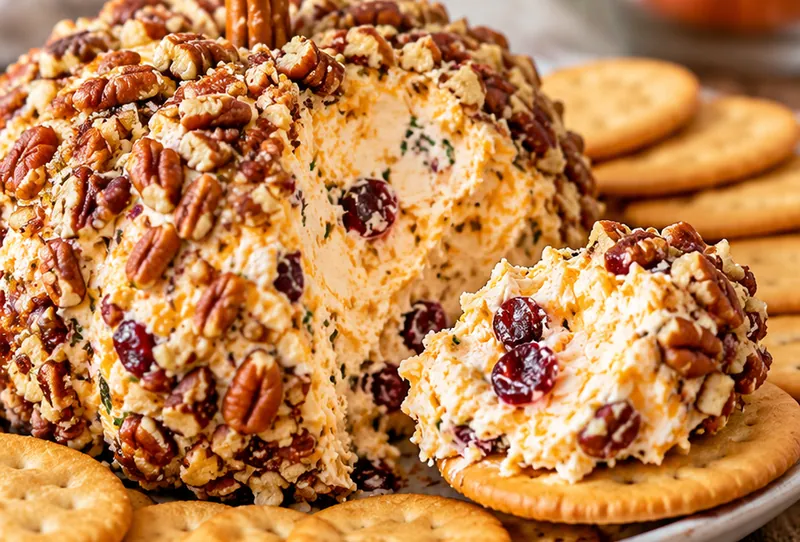
There's something about a cheese ball that makes a gathering feel festive, and this pumpkin version is the cutest one yet. The center is rich and velvety, made with softened cream cheese, plenty of sharp cheddar, a little smoked paprika, and a hint of garlic and green onion. The outside gets a crunchy, golden orange coat of crushed cheese crackers, and a pretzel rod stem with a fresh sage leaf turns it into a tiny edible pumpkin. Every swipe of a cracker brings a creamy, savory, slightly smoky bite that keeps people coming back.
This is the appetizer I make when I want something impressive that doesn't fight me for oven space. It's perfect for Thanksgiving, Friendsgiving, fall potlucks, game days, and even Halloween parties. Because it needs to chill before serving, you can make it a day or two ahead and simply set it out when guests arrive. That means one less thing to juggle while the turkey is roasting and the pies are cooling.
 Save
The first time I brought one of these to a family Thanksgiving, my niece refused to believe it was cheese until she dipped a pretzel into it. Now it's officially requested every year, and it disappears long before dinner is ready. If you love a little kitchen project that feels more like crafting than cooking, you'll have so much fun shaping the ridges with kitchen twine and seeing that little pumpkin come to life.
Pumpkin Cheese Ball Recipe (Easy Thanksgiving Appetizer)
Ingredients
Cheese Ball
Pumpkin Coating
Decoration
For Serving
Instructions
- Soften the cream cheese
Set the cream cheese out on the counter for about 45 minutes to 1 hour, until it is completely soft and leaves an easy dent when pressed. Cold cream cheese will leave lumps and make the mixture hard to shape, so don't rush this step. If you are short on time, unwrap the blocks, place them on a plate, and microwave in 10-second bursts until just softened but not melted.
- Shred the cheese finely
Shred the cheddar and smoked gouda using the small holes of a box grater. Finely shredded cheese blends more smoothly into the cream cheese and gives the finished ball a tight, sliceable texture. Freshly grated cheese also works better than pre-shredded bags, which are coated with anti-caking starch that can make the mixture dry.
- Beat the base
In a large bowl, beat the softened cream cheese with a hand mixer on medium speed for about 1 minute, until smooth and fluffy. Add the Worcestershire sauce, smoked paprika, garlic powder, onion powder, black pepper, and salt, then beat for another 30 seconds until the spices are evenly distributed and the mixture turns a pale peachy color.
- Fold in the cheese and onions
Add the shredded cheddar, shredded gouda, and chopped green onions to the bowl. Mix on low speed or stir firmly with a sturdy spatula until everything is fully combined and no streaks of plain cream cheese remain. Taste a small bit on a cracker and add a pinch more salt or pepper if needed.
- Shape into a ball
Lay a large sheet of plastic wrap, about 18 inches long, on your counter. Scoop the cheese mixture into the center, then gather the plastic wrap up around it and twist the top to form a round ball. Gently press and roll it in your hands to smooth the surface and flatten the bottom slightly so it will sit steady on a platter.
- Chill until firm
Place the wrapped ball in the refrigerator for at least 1 hour, or until it feels firm to the touch. A chilled ball holds its shape much better when you create the pumpkin ridges, so this short rest makes the next step easy and tidy.
- Prepare the coating
While the cheese ball chills, place the cheese crackers in a zip-top bag and crush them with a rolling pin until they resemble coarse sand, or pulse them in a food processor for 10 to 15 seconds. Pour the crumbs onto a plate or shallow dish and stir in the smoked paprika to deepen the orange color.
- Coat the cheese ball
Unwrap the chilled cheese ball and roll it in the cracker crumbs, pressing gently with your palms so the crumbs stick to every side, including the bottom. Sprinkle extra crumbs over any bare spots and pat them in. Aim for an even, generous layer so the finished pumpkin looks bright and golden.
- Create the pumpkin ridges
Wrap the coated ball loosely in a fresh sheet of plastic wrap. Tie 3 pieces of kitchen twine or stretch 3 large rubber bands around the ball, crossing them at the top and bottom like the spokes of a wheel, to make 6 evenly spaced sections. Tighten them just enough to press shallow grooves into the sides without cutting into the cheese.
- Chill again to set the shape
Return the cheese ball to the refrigerator for at least 1 more hour, or up to 2 days. This second chill locks in the pumpkin ridges so they stay defined after the string is removed.
- Add the stem and leaf
About 15 minutes before serving, carefully snip and remove the twine or rubber bands, then peel off the plastic wrap. Press any loose crumbs back into place. Push the pretzel rod piece into the top center to form the stem and tuck a sage or bay leaf beside it for a pretty finishing touch.
- Serve and enjoy
Set the pumpkin cheese ball on a serving board and surround it with crackers, pretzels, crisp vegetables, and apple slices. Let it sit at room temperature for 10 to 15 minutes before serving so it softens just enough for easy spreading.
Substitutions and variations
- Swap the crushed cheese crackers for crushed nacho cheese tortilla chips for a bolder, zestier orange coating.
- Use 1 tablespoon dry ranch seasoning in place of the garlic powder, onion powder, and salt for a classic ranch cheese ball flavor.
- Replace the smoked gouda with pepper jack if you like a little heat, or add 2 tablespoons finely diced pickled jalapeños.
- For a lighter version, use Neufchâtel cheese instead of full-fat cream cheese; the texture will be slightly softer, so chill it a bit longer.
- Stir in 1/3 cup crumbled cooked bacon or toasted chopped pecans for extra savory crunch inside.
Chloe's tips
- Make sure the cream cheese is truly soft before mixing; this is the key to a smooth, lump-free cheese ball.
- Keep the coating step separate from shaping, since rolling in crumbs before tying gives the cleanest pumpkin look.
- If the mixture feels too sticky to handle, lightly wet your hands with cold water or chill it for an extra 20 minutes.
- Add the cracker coating within a day of serving so it stays crunchy rather than soft.
- Use a pretzel rod for a sturdy stem; thin pretzel sticks can snap when pushed into a firm cheese ball.
How to store it
- Store the uncoated, wrapped cheese ball in the refrigerator for up to 4 days, then coat and decorate it on the day you serve it.
- Leftover coated cheese ball keeps tightly wrapped in the refrigerator for up to 3 days, though the coating will soften over time.
- You can freeze the uncoated cheese ball wrapped in plastic and foil for up to 1 month; thaw overnight in the refrigerator before coating.
- Do not leave the cheese ball at room temperature for more than 2 hours for food safety.
Serving suggestions
This festive pumpkin cheese ball pairs beautifully with a mix of crunchy and fresh dippers.
- Buttery round crackers, wheat crackers, or seeded crisps
- Pretzel crisps or mini pretzel twists
- Celery, carrots, cucumber rounds, and colorful bell pepper strips
- Crisp apple and pear slices for a sweet and savory contrast
- A Thanksgiving charcuterie board with salami, grapes, olives, and candied pecans
Frequently asked questions
Can I make this pumpkin cheese ball ahead of time?
Yes, and it actually tastes better that way. Make and shape the cheese ball up to 2 days ahead and keep it wrapped in the refrigerator. For the crunchiest coating, roll it in the cracker crumbs and tie the ridges the day before or the morning of your gathering.
How do I keep the coating from getting soggy?
Moisture from the cream cheese slowly softens the crumbs, so coat the ball no more than 24 hours before serving. Keep it wrapped and refrigerated until party time, and pat on a few fresh crumbs right before serving if any spots look dull.
What can I use instead of kitchen twine?
Large rubber bands work very well and are easy to remove. Wrap the cheese ball in plastic first so the bands never touch the cheese directly. Unwaxed dental floss also works in a pinch, but avoid flavored kinds.
Can I use pre-shredded cheese?
You can, but freshly shredded cheese gives a smoother, creamier result. Bagged cheese has a starch coating that keeps it from blending as well. If you use pre-shredded, chop it finely with a knife first so it mixes in evenly.
How many people does one cheese ball serve?
One cheese ball serves about 12 people as part of an appetizer spread. If it's your only appetizer or you're hosting a large crowd, double the recipe and make two pumpkins of different sizes for a charming display.
Let's get cooking!
This pumpkin cheese ball proves that the most memorable holiday appetizers don't have to be complicated. With a creamy, cheesy center, a crunchy golden coating, and that adorable little stem, it brings a smile to every guest who walks into your kitchen. Make it ahead, set it out with your favorite dippers, and enjoy a few extra minutes with the people you love this Thanksgiving. Happy hosting!